
To start my first final poster I opened up the edited photo of myself in photoshop.
The first thing I needed to do was remove the background.
To do this I first used the quick selection tool, and highlighted the areas that I wanted to keep.


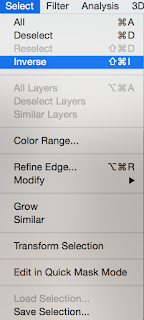 Then I choose 'Select' than 'Inverse'
After that you press the backspace and chose the white fill and press okay.

The edges are still a little to sharp so I just use the rubber tool on the soft round brush so as to make the edges more soft.
what I also had to do was to make the bottom half of the image is harder so that the next layer of images that go over the top will be the only thing that is seen rather than the arm.

This is how it turned out. It is now ready to start adding the next layer of images.

The first image I chose to place in this silhouette is the London skyline. To do that I went to file then 'Place...' and chose the file. I then stretched it out so it would fit the shape.

For each image I changed the side drop down box option from 'Normal' to 'Screen' this allows the images to seem as though they are better fitted around the background image.

I then added the next image which was taken in Portsmouth of the Guildhall.
This is when I had to start removing some of the other image so that you are able to see both of them, to do that I used the rubber tool with the soft round brush.


The next image was the graveyard, this filled up the rest of the space that was free from a photo.
I did the exact same thing to this photo as with the previous.

The next thing to do was to add the sky parts, luckily i had already had the start of a sky from the London skyline photograph and would be easier to blend in.
when i had been out taking photos of London and Portsmouth I also was able to take some sky shots, one with birds and some with clouds. This is what I am going to use to make the extended sky.


I felt that this colour was a bit to bright and stands out to much so I decided to change the fill.

The next thing I needed to add to this design was the background.

As this piece is linked to the theme of Batman I felt that it was laking that link so designed my own bat signal to put within the buildings.

This I had been happy with, but still felt that it was laking one more thing.
That is when I decided to a moon in at the top of the sky yo show that i wanted it to look like a nighttime scene.

No comments:
Post a Comment