Translate

Monday 17 November 2014

Abstract Conversation Paintings

to create these pieces we started of looking into the work of Jackson Pollock, Franz Kline, Cy Twombly, Clifford Still and Fiona Rae. 

They each show different ways to create abstract paintings, once we had got inspiration from these artist we were ready to create our own pieces.

To start we had to chose between either white or black paper and then get some red, yellow, blue and white acrylic paint.
For my first piece i had decided on white paper.

We were told that each mark should contradict/contrast with the previous one(s).
That the marks could overlap, attach or even insert into previous marks.
making sure to vary the stronger and lighter marks to the softer and sharper.


Here is that finished piece.


Mould Making


Mould making - 

we were told that we were going to be making a mould for a bowl/vase, so the first thing we did was to do some initial sketches of shapes we would want to create. 
I had chosen a shape that was small at the base and got larger towards the top. 

After I had decided what shape I wanted my mould to be we were told that we had to build the shape up upside down in a block of clay 

Below is an image of my finished block to create this we had to make sure that there wasn't any under  cuts otherwise when we've poured in the plaster and let it dry the mould won't be able to be used because them the finished piece would come out without breaking. To create the smooth edges we used a kidney bean  


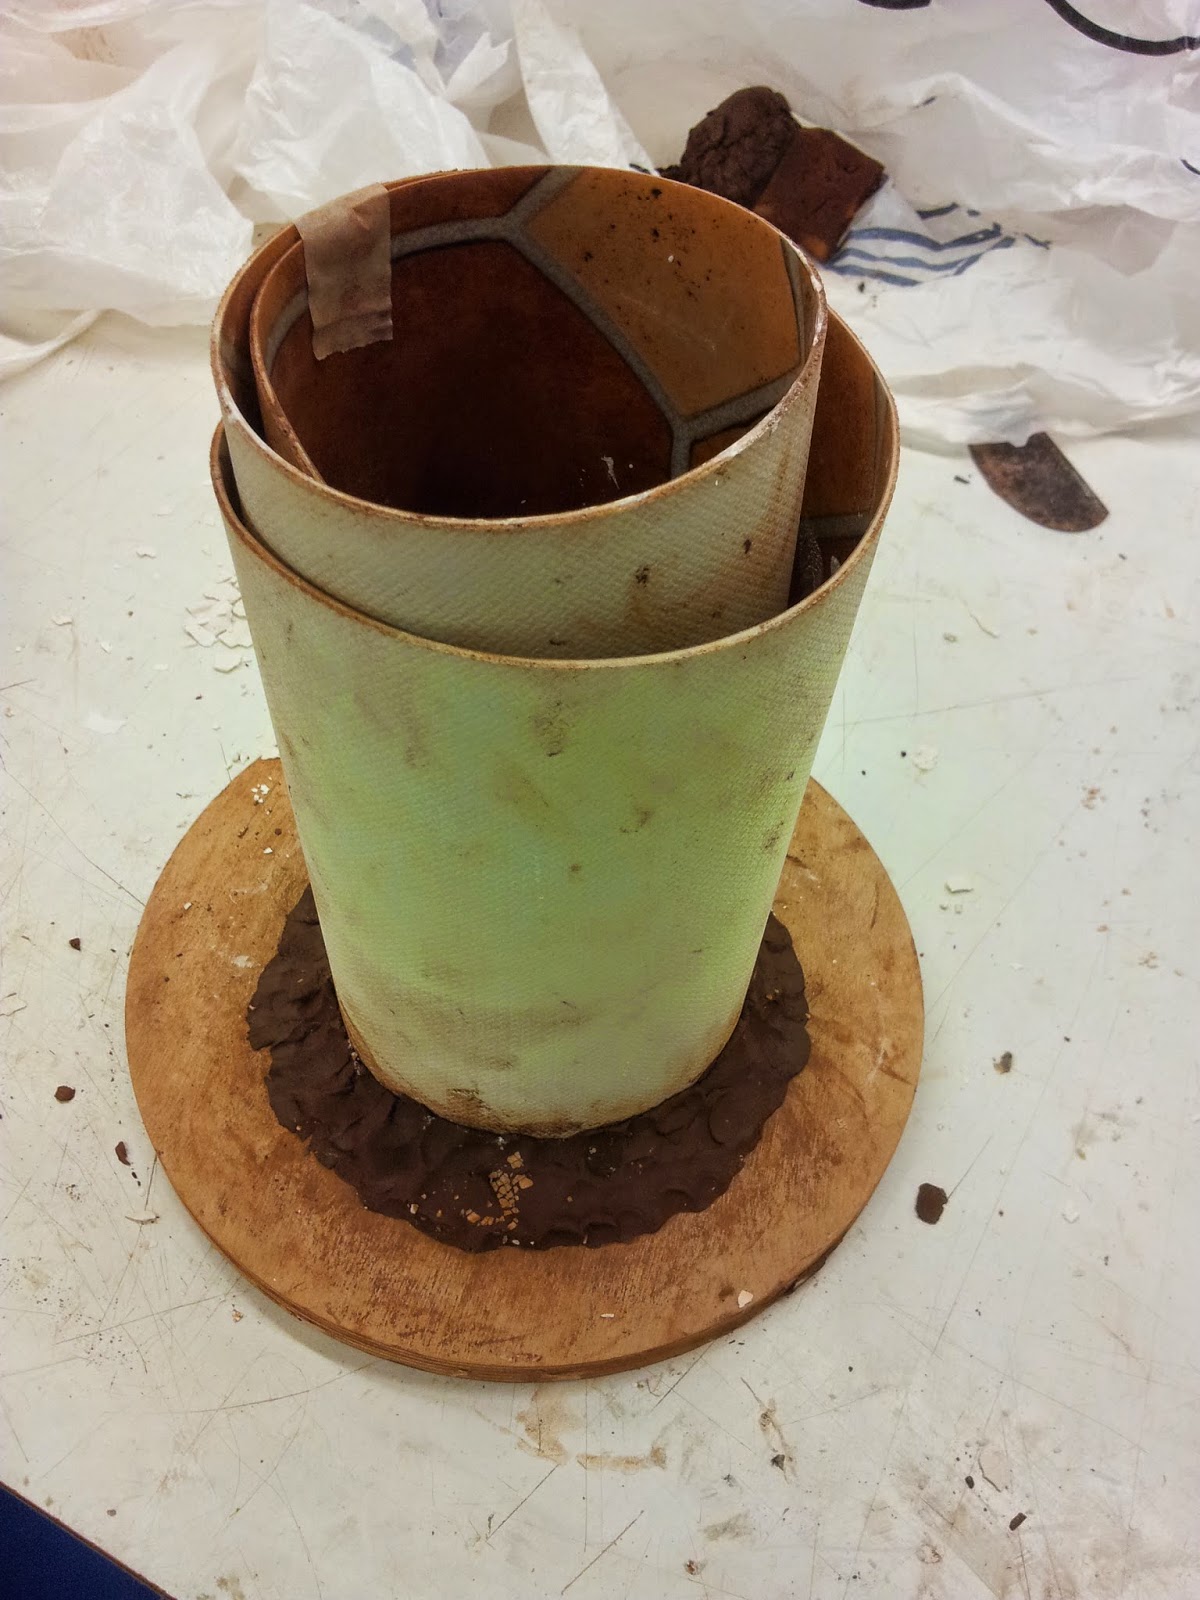
The next step was to grab some lino making sure that the piece is taller than you clay mould, using both the clay and masking tap make sure that there are not any gaps where the plaster could leak out.


Now its time to make the plaster, to do this you have to start by getting a plastic container and filling it up a quarter of the way up with warm water then with a spoon slowly add the plaster powder into the water mix it with you fingers, and keep adding more plaster until it is thick. (When mixing make sure to always keep it moving don't leave your fingers in there for a long period of time)

Now you take the mix d plater over to your prepared mould and slowly pour it, you only have to pour the mixture up to the point where it had covered the whole of your clay mould.


Leave it to harder for about 15 minutes, and to test if its dry run one of your fingers nails across the top of the mould if nothing comes off with your nail then it is set and ready to be un wrapped.


Here ^ is a picture of my mould after I had unwrapped it the next thing we did was to release it from the board on the bottom sometimes this comes off easy, but in my case my lecturer had to use a chisel and hammer lightly to release it. 

Then you flip the mould over and get all of the clay out from inside, this had been quite challenging for me as I had such as small and slender shape.

Then we left them on the shelves until next week.


The next step is to make a slip cast, to do this you get your mould and watered down clay pour the clay all the way to the top of the mould let that dry over night then with a pointed tool gently pry out the cast

This is what i got left with, due to it being so thin mine ended up breaking off a little, but because i now have the mould i can make several more of these.

The artist we looked at for this workshop was Picasso.

The Pen Tool

Adobe Illustrator

At first the pen tool can seem quite hard to master, but after you have learnt the basics and practice, over time you realise that after all it is a piece of cake.

The first thing to do is draw a straight line.

To do that click and release the mouse where you would like the line to end and then click again  
The next thing to master is a curved line

To start you follow the same procedure as the straight line, but when you make you're second click rather than dealing it you hold on to it and then move it in which either direction to get the desired curve.

now you have the power to create all sorts of shapes and imagery.

Sunday 16 November 2014

Frottage

The next workshop we looked into was frottage we started by looking into the work of Max Ernst and Wassily Kandinsky.

Ernst creates his piece by taking some frottage and then cuts it all up and then sticks it back together in different places.


On White II - 1923
Oil on canvas


Materials needed: 
 - thin pieces of cardboard
- lots of thin textured materials
- Glue
- Scissors

I started by cutting out two different sized triangles out of textured wallpaper, I then placed them to the side next I decided to cut out a small circle from mesh I then cut a square around the negative space that the circle left, I thought that it could make a nice positive/negative combination. 
Now I felt ready to start making my board the first thing i did was to just position the materials and shapes before gluing them down. i then got some masking tape and placed a strip of it down the bottom left hand side, this is what helped me to figure our what went where.

Once finished it was time to start taking the rubbings, I placed my board does on the table and laid a piece of paper over the top of it then i grabbed a graphite stick, making sure to use it one it side. Holding the piece of paper started to rub the print through onto the piece of paper. 

I then copied this several other times, later one I tried making a print from using printing inks by just rolling the ink over the paper to get a darker print than the graphite would give you.


Pinch Pots

Week 1: Open Forms 

using a pinch technique we were told to make at least 4 pots 

those four are:

-really open 
-tall
-bowl
-difference

2 pots had to be made from white clay and the other 2 in red.

I started with the white clay. 

First I rolled it into a ball and I pushed my thumb into the middle of it, then I start to push my thumb towards the side while holding it in my other hand the first pot I decided to make was the bowl I knew that i needed to have all of the sides even. I didn't wanting it being to thin but quite a small bowl.
In the image below my bowl is the one with the wavy rim, I had started off by making it flat but later changed it to wavy.

The next pot I decided to make the really open pot like with the bowl pot I started with a ball of clay but this time it was a little bigger, I put my thumb into the ball and rather that the bowl I had decided that the sides had to be a lot thinner this time so that I could make it so wide.

Before I moved onto the red clay I had to make sure to wash my hands because otherwise the clay would mix in with the other clay. (which doesn't look very nice.)

Like with the previous two pots you start out with the ball of clay in your hands and putting your thumb into the middle of it. I found that working with red clay was a lot more difficult than the white as it is a lot stiffer. 

To create both of the red pots I had to push the clay down rather than out, so then it would become taller. 
The taller bowl with the small opening was quite challenging because I had to try and make it smaller without leaving clumps of clay to make the neck smaller I did a little cut and took out a section of it and then with the left over sides I pushed them together and then smoothed it so it didn't look out of place. I had repeated this three times around the top of the pot.          


Week 2: Closed Forms

Aim to create 3 closed forms that use:

- Additions
- textured surface
- piercing

To create close forms you have to start with two of the same size bits of clay roll them into spheres and like with the open forms you have to push the clay outward to make it into a semi circle.

Once you have done that to both of the spheres you have to slash all the way round the rim of the semi circles and then apply some slip.

Take one in each hand and then gently twist in opposite directions until they form one whole circle, once you feel you have twisted enough, lightly with a wet finger go around the join of the two semi circles and smooth it up and down all the way around so there is no more join left and it becomes one form. 

Repeat this several times, bearing in mind that if you want to create a more oblong shape, then when you are pushing the clay outward make sure to keep pushing it till it makes the desired shape.

Here is a picture below of my finished closed form, my favourite thing to do to these forms was to pierce them that is why in all three of them that is what I have done.


Week 3 : Joining closed forms

As we had looked at creating open and closed forms separately, it was now time to make a final piece that consisted of joining 3 closed forms together.

Taking inspiration from the tester pieces I made i created this piece, I feel that together each part of my final piece represent one of my tester pieces. 

My main inspiration was from Pamela Sunday.

Due to the use of piercing. 


Saturday 15 November 2014

Pamela Sunday


Pamela Sunday makes ceramic sculptures inspired by nature and science.

Her interests in natural forms dates to childhood, when she played alone in the woods, combing the ground for fossils and hiding in hollowed out trees.
Before discovering her love of clay in the early 90s, Sunday worked as a art director for Bergdorf Goodman.


http://pamelasunday.com/

http://www.pinterest.com/search/pins/?q=pamela%20sunday%20sculptures